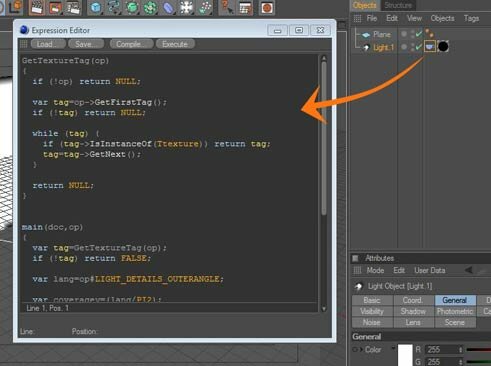
GetTextureTag(op)
{
if (!op) return NULL;
var tag=op->GetFirstTag();
if (!tag) return NULL;
while (tag) {
if (tag->IsInstanceOf(Ttexture)) return tag;
tag=tag->GetNext();
}
return NULL;
}
main(doc,op)
{
var tag=GetTextureTag(op);
if (!tag) return FALSE;
var lang=op#LIGHT_DETAILS_OUTERANGLE;
var coveragey=(lang/PI2);
var coveragex=coveragey*0.5;
var offx=0.25+coveragex;
var offy=0.5-coveragey;
var leny=coveragey*2;
var lenx=-coveragex*2;
tag#TEXTURETAG_OFFSETX=offx;
tag#TEXTURETAG_OFFSETY=offy;
tag#TEXTURETAG_LENGTHX=lenx;
tag#TEXTURETAG_LENGTHY=leny;
}
{
if (!op) return NULL;
var tag=op->GetFirstTag();
if (!tag) return NULL;
while (tag) {
if (tag->IsInstanceOf(Ttexture)) return tag;
tag=tag->GetNext();
}
return NULL;
}
main(doc,op)
{
var tag=GetTextureTag(op);
if (!tag) return FALSE;
var lang=op#LIGHT_DETAILS_OUTERANGLE;
var coveragey=(lang/PI2);
var coveragex=coveragey*0.5;
var offx=0.25+coveragex;
var offy=0.5-coveragey;
var leny=coveragey*2;
var lenx=-coveragex*2;
tag#TEXTURETAG_OFFSETX=offx;
tag#TEXTURETAG_OFFSETY=offy;
tag#TEXTURETAG_LENGTHX=lenx;
tag#TEXTURETAG_LENGTHY=leny;
}
It automatically adjusts the projection of the texture tag that's on the light.
UPDATE :
Another way to make a light projection is to use the scripts from Per-Anders Edwards.
Script for setting a texture tag on a spotlight to teh right size/projection to cover the
spotlight itself (just place in a coffee tag on a spotlight)
Code:
Note :
Projection to the texture of light normally be done manually for mapping coordinates, to
ensure that all the projected texture is correct (tilling or mirroring), there will be a problem if
the parameters of light was changed so that you have to do the mapping back again.
if you find it a bit difficult to adjust the texture for your projection, try this little plugin
(Auto Gel Projection) created by James Kaufeldt, the problem can be solved well, a simple
helper plugin (tag) that automagically handles recalculating the texture mapping coordinates
for light objects. Auto Gel Projection is freeware and works with Cinema 9.5 or higher, on
Mac and Windows, Get it >>> HERE <<< (Passw : jag4d.com) - sorry only for C4D 9.5 or
higher, Windows. (Thanks to James Kaufeldt for a Very handy and useful plugin.)
UPDATE :
1. Update link to download plugin (Only C4D 9.5 or higher, Windows)
2. Another way to make a light projection is to use the scripts from Per-Anders Edwards,
Click here take a look at updates section



Cinema 4D Modeling and Animation
Support for JAG4D
[C4D] Light Projection
This tutorial is a quick example of making a light projection and some tips for that, then you can experiment with this.
Step 1. Put a texture on your light, Turn on Visible Light > Volumetric in the light's General tab.
transparency channel > texture > Gradient > set the gradient as you wish > type : try the various types of gradient then apply this material as a tag to your Light in the Object Manager
transparency channel > texture > Gradient > set the gradient as you wish > type : try the various types of gradient then apply this material as a tag to your Light in the Object Manager
To use it is easy. Simply illuminate your scene with a Light of your choice; then make a MATERIAL which consists only of an active transparency channel or alpha channel. Then add the Auto Gel Projection tag to a light that uses a material with a transparency map or alpha map, and the tag will make sure that the map is correctly projected based on the lightsource parameters . That's basically it.
Here are some examples :
Using the transparency channel of the texture.
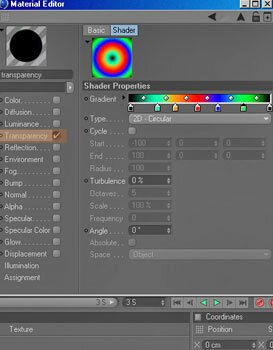
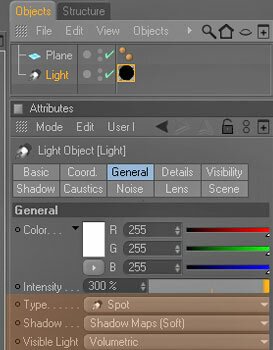
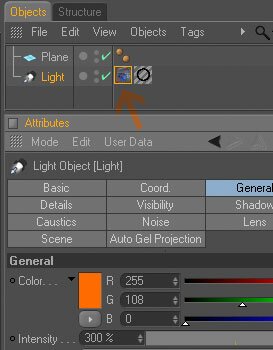
Step 2. Add the Auto Gel Projection tag to a light object (Select the light object > Tags > Auto Gel Projection tag)
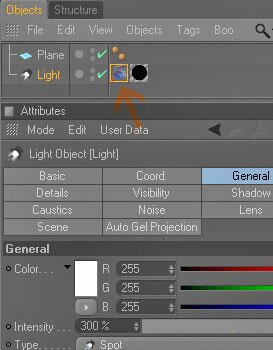
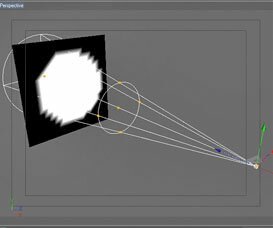
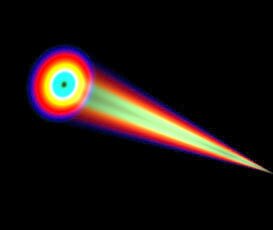
Step 3. This is the result
Using the alpha channel of the texture.
Step 1. Put a texture on your light, Turn on Visible Light>Volumetric in the light's General tab.
Load the bitmap or surfaces texture into the ALPHA channel, then apply this material as a tag to your Light in the Object Manager
Load the bitmap or surfaces texture into the ALPHA channel, then apply this material as a tag to your Light in the Object Manager
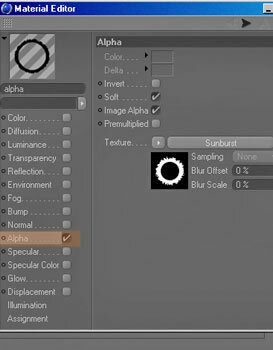
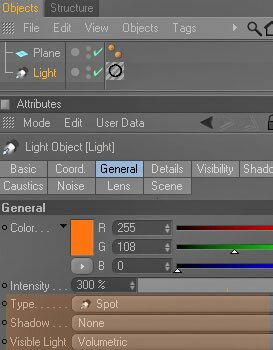
Step 2. Add the Auto Gel Projection tag to a light object (Select the light object > Tags > Auto Gel Projection tag)

Step 3. This is the result

Tips
1.
2.
3.
1.
2.
3.
To clearly visualise how the texture will be projected, select the texture tag and the light object in the object manager, then click the texture tag to bring up the light source parameters. Try to change the outer angle of the light, then the parameters of light will be changed automatically...so if you are animating any of the parameters that affect the mapping, the tag should remain in order for the changes to have any effect on the projection parameters.
Try adding a C4D FILTER effect to it... with FILTER, you can change the contrast of the map and/or blur them slightly to achieve a softer effect.
Try the various types of light and the 'visible light' to get the desired results
Final result ( swf format )


